

curl call that returns the model’s reply, then shows the same job done from a config file. Use it when you have a running instance and want your first agent, or a new one.
The example is a two-stage pipeline named Question answerer. The first stage answers a question sent in a JSON body and the second rewrites the answer as one paragraph.
Before you begin
- A ServFlow account at dash.servflow.io, or a self-hosted instance.
- On a self-hosted instance, an LLM provider. In the sidebar under Configure, open Providers and add one if the list is empty. See Manage LLM providers. On ServFlow Cloud with a Starter or Pro plan, or with bought credit, you can skip this: a sub-agent with no provider uses built-in model access.
Create an agent in the UI
Create the agent
1
Open the Agents page and click New Agent
In the sidebar under Build, open Agents. Click New Agent in the top right. The New agent dialog opens and asks how to start.
2
Choose Start from scratch
Choose Start from scratch. The Details group appears.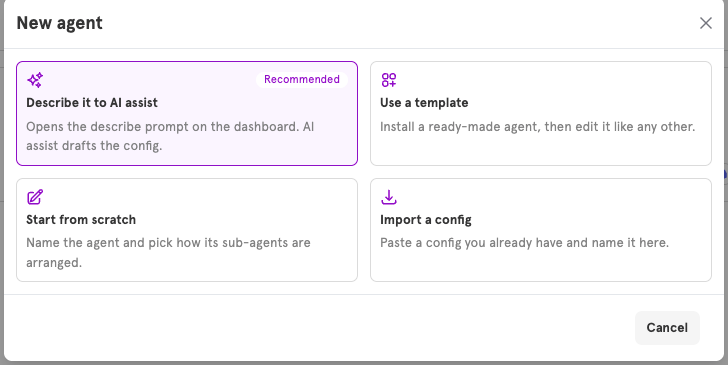
3
Name the agent
Enter a Name, for example
Question answerer. Optional: add a Description. The Architecture group appears.4
Choose an architecture
Choose Sequential pipeline and set Pipeline stages to 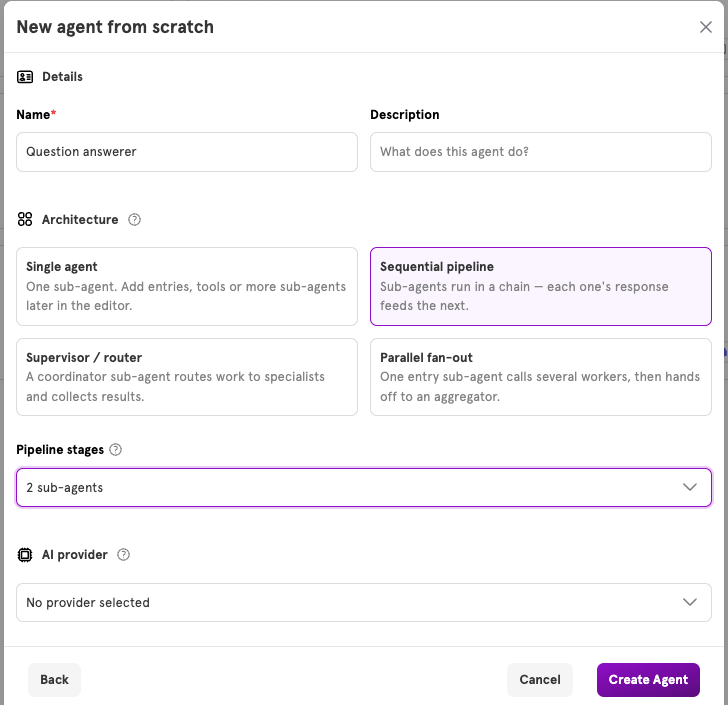
2 sub-agents. The AI provider group appears.5
Choose a provider
Under AI provider, choose the model every sub-agent runs on. On ServFlow Cloud, keep No provider selected to use built-in model access. On a self-hosted instance, you can choose Choose later and pick one per sub-agent in the editor.
6
Click Create Agent
Click Create Agent. The editor opens on a canvas with four nodes from top to bottom: the entry, labelled Manual trigger, the sub-agents Analyze request and Compose response, and Final response. The agent is saved but turned off, and its id, 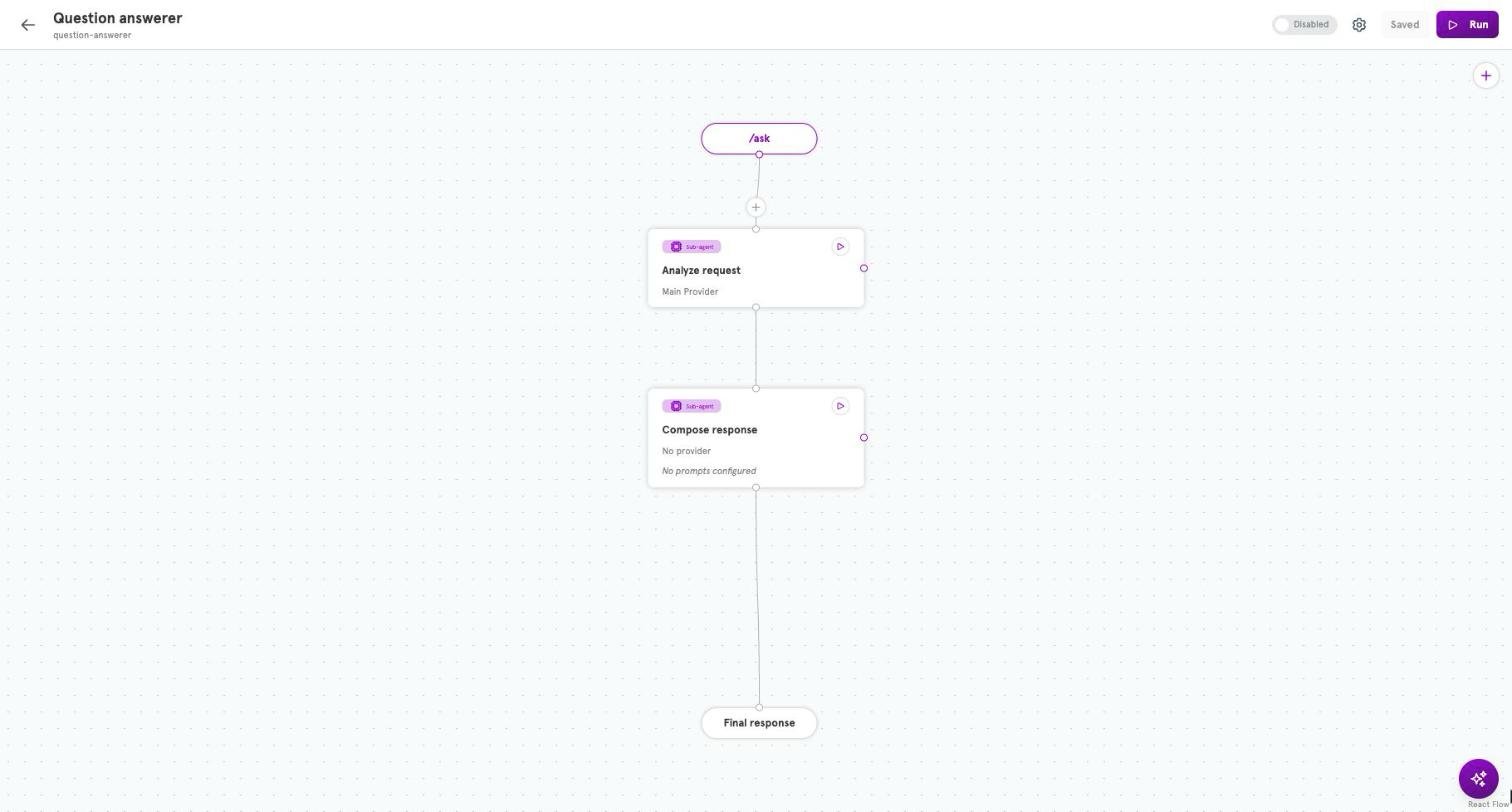
question-answerer, is derived from the name.Set the entry
The entry decides how a run starts. A new agent starts as a trigger that runs by hand or on a schedule. To make it answer HTTP requests:1
Open the entry panel
Click the Manual trigger node. The Entry panel opens on the right.
2
Choose the webhook entry type
Under Entry type, choose Webhook — a plain HTTP request starts the agent. A Path field appears.
3
Enter a path
Enter 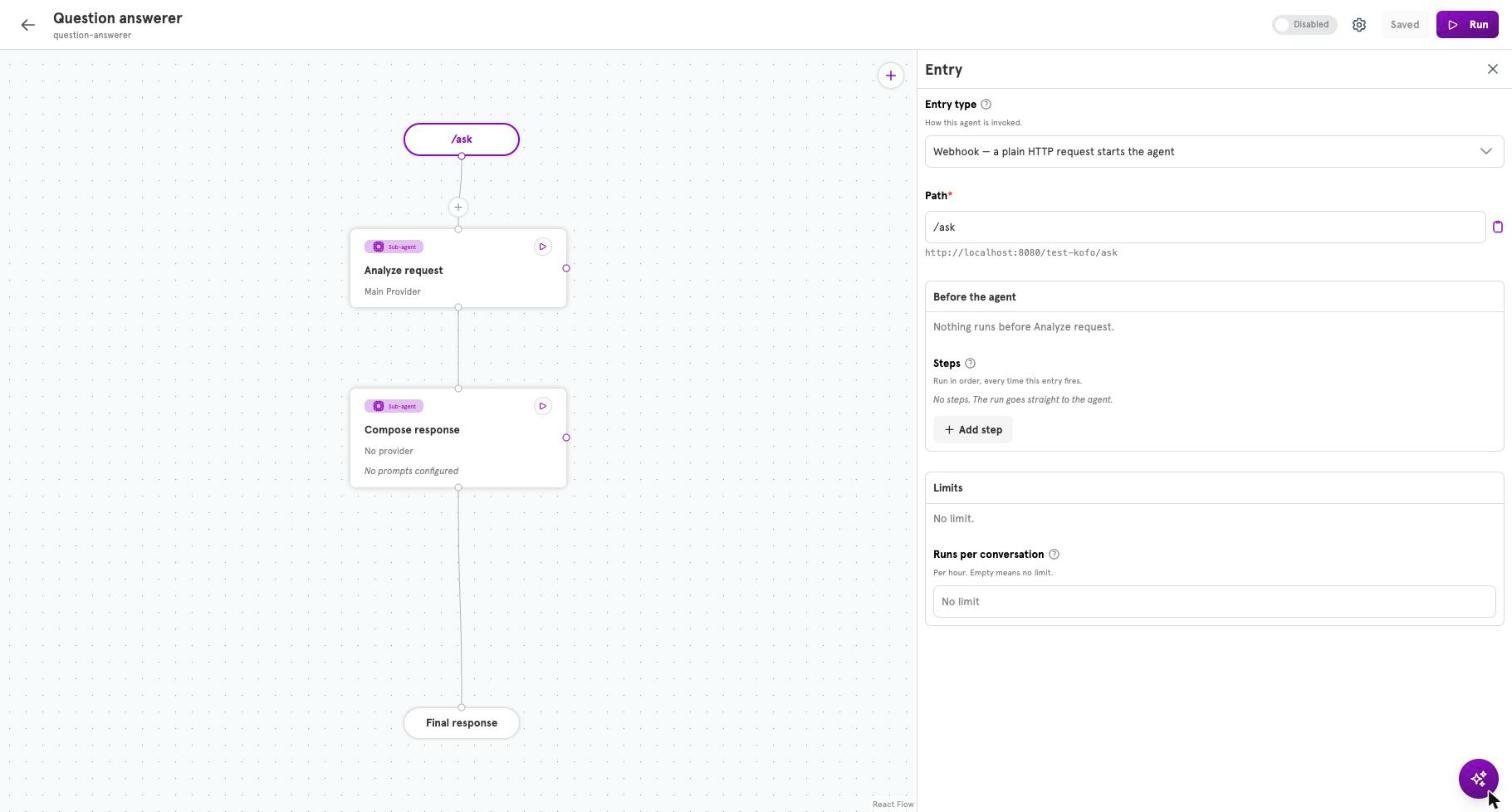
/ask. The entry node on the canvas relabels to /ask. The agent answers POST requests on that path.Configure the sub-agents
1
Open the first sub-agent
Click the Analyze request node. Its panel opens.
2
Choose a provider
If you chose a provider when you created the agent, it is already set. Otherwise, under Provider, choose one. The panel confirms with “Calls” and the provider’s name. On ServFlow Cloud, you can leave it empty to use built-in model access.
3
Write the prompts
Under Instructions, enter a System prompt:Enter a User prompt that reads the request body:The 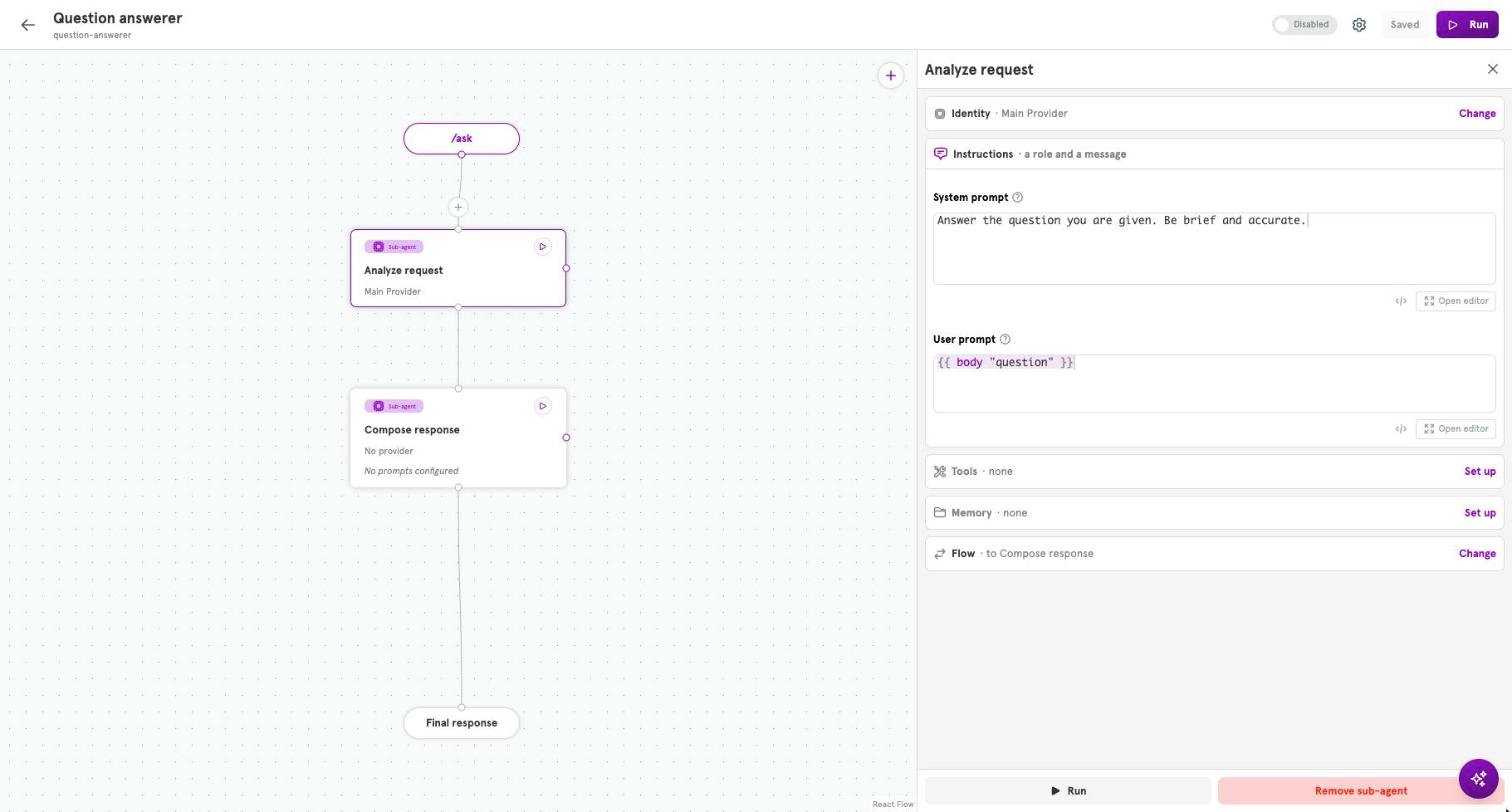
body function reads a field from a JSON request body.4
Configure the second sub-agent
Click the Compose response node. Choose the same provider and enter a System prompt:Leave its User prompt empty. In a pipeline, a stage receives the previous stage’s reply.
5
Save
Click Save in the top bar. The button reads Saved. Saving stores the agent; it doesn’t start serving it.
Verify
Test the agent from the editor first:1
Click Run
Click Run in the top bar. The run dialog asks for a Request body.
2
Enter a request body and run
Enter the body and click Run:
3
Read the result
The Run panel shows Completed, a log of each sub-agent’s turn, and a Final response block with the reply and duration. New payload runs it again with a different body.
body function only reads requests sent with Content-Type: application/json.
Create an agent from the CLI or MCP
If you keep agents in files, describe the agent in a JSON or YAML document and create it with theresource command. It writes to the same store the dashboard uses, and a created agent is off until you enable it.
providerID with a provider id from servflowai resource provider list.
Related
Available entry handlers
Every entry type, its fields, and the variables it injects.
Agents
What an agent is made of: entries, their steps, and sub-agents.
Dynamic content
Template functions such as
body, param, and secret.Self-host ServFlow
Run ServFlow on your own machine.